30 April 2010

Texturing the train tutorial

This part of the illustration needed a sleek, modern commuter train. An elongated, rounded cube was built in Cinema 4D, but it needs a lot of Photoshop work to get it there. The train render layer is using its own alpha channel as a mask, but I put all the train layers into their own folder, which is using both a layer mask and a vector mask. Here you can see the vector paths I created for the folder mask which curve the corner a bit more and cut out a bit from the bottom. Some parts of the train hang below the 3D cube, so work on layers below the render (Layer 52) to add some simple shapes around the wheels with dark greys. Adding a Color Overlay effect in Multiply mode is an easy way to make them look darker.

The end of the train should be created as a new image. This can be quickly and easily done with Shape layers and Layer Styles. PMS 1797 was used as the base color. Use a dark grey to make lines and holes on new Shape layers. Remember to hold down SHIFT to add to your layer, instead of making a new one. The lines have a simple effect of Bevel and Emboss and Outer Glow (dark warm grey set to Multiply, of course). You can use white for the bevel highlight, but change the mode to Linear Dodge to make them more intense and specular, suggesting metal. Use the same effects for similar pieces of the train. Create the rest of the shapes with the Rectangle and Rounded Rectangle tools. Use the Direct Selection tool (white arrow) to pull in corners and create angles. You should end up with something like this. A judicious use of the effects will suggest the details you need. The window uses a black Stroke and subtle Gradient Overlay. The angled piece under the window facing upward uses a white Gradient Overlay to reflect an overhead light source and a little Inner Shadow to show the shadow cast by the vertical piece to its left. The lights have Gradient Overlays with a Reflected Style. What's great is that because it only has vector Shape layers with Layer Styles, this image is completely resolution independent.

This entire image was brought in as a Smart Object. Transform it into position and add Color  and Gradient Overlays to make it work. I used PMS 296 in Multiply mode to put the back in shadow. The color of the rendered cube doesn't quite match the colors of the back texture, so I added a layer of PMS 704 in Color mode to get it to match.

Create the train's side texture using the same techniques as for the end. To give it some more gritty realism, you can add streaks, one of my favorite tricks. Refer back to the 27 February tutorial if you need a review of how to accomplish this using the Wind filter in an alpha channel. Load a selection and fill a new layer in Multiply mode with a warm dark grey. Adjust the Opacity as needed. For more grime, load a selection from the windows and fill it on a new layer. Set the Fill to 0% so these pixels are transparent and give it a dark Outer Glow in Multiply mode. Add some noise to the glow to roughen it up. To take it even further, paint dark grey around the door seams with a scatter brush on a new layer set to Multiply mode. Adjust all the Opacities to your liking. Yes, the reflection is a photo, one I took in Boston, I think. If you notice, it is nice and sharp on the window glass, but has a Gaussian Blur and lower Opacity over the metal sides. This is to differentiate between the glass, which has a more accurate reflection, and the metal, which will be more diffused. As a final touch, a light blue gradient at the top suggest the sky's reflection as the side curves away at the roof.

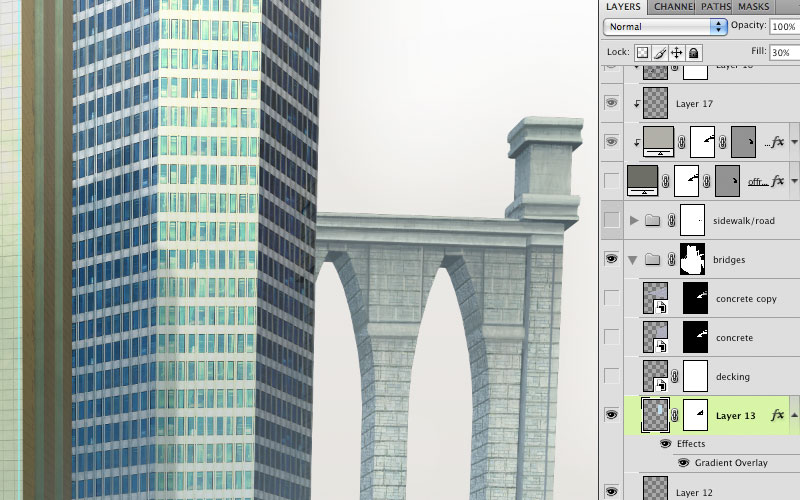
Here it is transformed into position, but it needs some masking to make it fit. The tricky part is that it needs both sharp-edged and soft masks. Use the Pen tool to make a vector mask that hides the side texture along the shadow cast by the tunnel. Use the Polygonal Lasso to make a layer mask along the top and end. Then, open up the wonderful Mask panel, new to CS4. Adjust the Feather of the mask to soften its edge and suggest a curving up to the top, rather than a hard corner. The softer the edge, the more gentle the curve. Corners will often catch a glint of highlight along the edge, especially if they are metal. A curved corner will have a wider and softer highlight. To simulate this, add Drop and Inner Shadow effects. Use PMS 698 and Color Dodge. With the same color, opacity, and blend mode for both shadows, a nice, intense, and soft-edged specular highlight follows this edge of the train's roof. The glint layer above it uses a radial white-to-transparent gradient in Color Dodge. You can see how this blend mode really gives the illusion of shiny metal.

Don't give up, we're almost done. The top of the train has this long black piece. Never use pure black or white. In this case, try a very dark grey like PMS 433. To get the highlight along its corner edge, use an Inner Shadow with the settings shown. Choosing a light color and Color Dodge will make it a higlhight, but change the Contour to Cone. Now you have a line away from the edge that is perfect. Adjust the Size and Distance to control the height of this black piece and how curved the corner is.

For the finishing touch, we need some glowing lights. Make them with the Rounded Rectangle tool and use Cool Grey 1 and a vibrant orange. The Inner and Outer Glows actually use the default yellow color in Screen mode. The kicker here is the Drop Shadow. With the Distance set to 0, it acts more like an Outer Glow. Set the color to white and the blend mode to Linear Dodge. What's the difference between Liner and Color Dodge? Color Dodge sometimes keeps a bit more color, but has a hard time showing up against dark backgrounds. In fact, it won't show up at all over black, so in these cases, you may need to try Linear Dodge. The intense, glowing aura of the lights is created by the combining of the Linear Dodge Drop Shadow and The Screen Outer Glow. The same approach was used on the amber lights, except with orange glows. This 'doubling up' of lightening blend modes is a good way to simulate luminous glows.

That's it! There was more here than I initially realized, so I worked hard to cram it all in. The truth is, this could easily end up being 2 or 3 tutorials. But I hope you got something out of it, anyway.

22 April 2010

Texturing and painting the bridge tutorial

The bridge was built as a very simple 3D model and textured in Cinema 4D. It's a good starting point, but it needs some more detail and realism. The first step is to reduce the size of the stone blocks somewhat. The very same texturing technique used for the buildings will work here as well. Create a new layer and fill it with a color. Add a Pattern Overlay effect and choose a brick or stone texture. Convert that layer to a Smart Object and transform it into position using Skew or Distort, then adjust the Opacity and Blend mode as needed. I chose Darken at 70%. Now the larger blocks are obscured and there is more stone detail. And because it's a Smart Object, you can go back in and change the pattern's scale or choose a new one if you want to later.

Now it's time to start painting. Do this on a new layer with a fairly simple brush and the Opacity Jitter set to stylus. Paint in some architectural features to cover up the overall stone texture. Top areas will need cornices and edges often have larger stones. To paint the straight lines, you can use the Line tool with the option set to Fill pixels. That creates new pixels on your current layer, instead of making a new vector Shape layer. You can also click with a brush, then SHIFT+click elsewhere and Photoshop will draw a straight line between the two points. This often works better with a mouse. With a stylus, it's hard to get enough pressure for that second click. Add a new layer and set it to Multiply mode. Choose a warm grey or brown and paint in streaks and stains. These will often be under overhangs and in crevices. Use a photo as a guide for how it should look. In case you can't tell, this bridge was loosely based on the Brooklyn Bridge.

As usual, clip all these layers down to the bottom render layer, which will act as the clipping mask. If you need to add details that stick out past the alpha channel of the original render, do it on a layer that is not clipped along with the rest. Since I lowered the top of the arches, I had to do this to show their undersides. Add a layer of light blue and maybe a Gradient Overlay to give the bridge some atmospheric perspective and push it back into the distance. As a last step, put all the bridge layers into a layer group and add a mask to it, then paint out some of the edges with black on this mask to remove the sharp, straight lines of the original 3D geometry and make it follow the contours of the new painted details. I did this on the group's mask so that I wouldn't mess up the rendered alpha channel used as a mask on the bottom layer.

That's about it. This was a quick one, but I hope it's useful. Tune in for more before the month is over.

15 April 2010

Creating dirt texture tutorial

A dirt material was applied to the base geometry in Cinema 4D, but the render came out looking flat and smooth. It needs some realistic texture applied in Photoshop to to make it look rough and natural, more like real dirt. In the past, I have painted dirt by hand or tried a combination of filters to get the right look, but that is time consuming  and doesn't end up looking very real. I decided to create the texture from a photo. A couple of years ago, as I was traveling through Guatemala, we were stopped to wait for road construction (that happens a lot there). Near the road was a section of earth that had been cut away, leaving this great cross section of dirt, so I took some photos. This is why it's always a good idea to carry around your camera with you.

Drag the photo over and transform it into position using Distort or Skew. Change the blend mode to Luminosity. Now, only the dark and light values of the photo are affecting the image behind it; the hue remains unchanged. Duplicate the photo layer and experiment with blend modes and opacity. I ended up with Normal at 70%. Photo-based textures tend to look better if you combine several different images with different blend modes and opacities, instead of just using one photo.

Select the angled part on the left and skew it a bit more to follow the plane of the original 3D model. For the little sliver that faces to the side, you can just paint it by hand. Choose a simple brush with the Opacity Jitter set to stylus and hold down ALT/OPT to pick colors from the surrounding areas. Start big and work down to the smaller details. Continue the different bands along this face and pick new colors often to add more color diversity.

To make the roadway look like it's hanging over the dirt a bit and casting a shadow, create a new layer and make a selection along the edges of the roadway with the Polygonal Lasso tool. Fill it with any color and add a Layer Style. Set the Fill to 0% so that the pixels on the this layer will be transparent, but the effects will still be visible. Give it a Drop Shadow and adjust the settings similar to what you see here. Remember to uncheck Use Global Light, so that other effects won't change. The scene was rendered as a multi-pass, so I've got separate layers for the shadow and ambient occlusion calculated by Cinema 4D. These layers were dragged over on top of the photo and paint layers to add greater realism.  

One of the products shown in this illustration is a pump for water deep underground. The dirt cutaway needs to have a cavity with water in it. Paint a rough hole using a dark brown picked from the surrounding dirt. Let the cracks and contours of the texture be a guide as you paint the edge. Give it a dark Outer Glow in Multiply mode and a Bevel and Emboss using settings like these. Color Dodge for the highlight will not affect the darker areas as much as Screen would. The Chisel Hard Technique makes the edge rougher and more angular. Reduce the Fill of this layer to 80%.

For the water, create a shape layer using the Pen tool and clip it to the void layer. Use a dark blue as the fill color and add an Inner Glow of light blue in Screen mode. Yes, sometimes, I actually use light glows. A light blue stroke represents the edge of the water cutaway. Reduce the Fill to 70% so that the water becomes somewhat transparent, but the Layer Styles remain unaffected. A light blue shape on top represents the top of the water. Because both these layers use the void layer as a clipping mask, they inherit its Fill setting of 80%.

As a final touch, roughen up the edges by painting on the mask of the bottom render layer. As before, let the cracks and contours be your guide on where to cut away the edge. This will help sell the idea that it's rough, loose dirt. That should about do it. Now we have what looks like a chunk that is cut out and removed from the surrounding ground and it's about as realistic looking as something like this could be.

06 April 2010

Transforming Smart Objects with Layer Styles tutorial

This is the final render of the 3D scene I had to work with. It's a good start, but it has that sterile, perfect look that is so easy to do in 3D. However, it's great for taking care of composition, shadows, and perspective and is a good foundation to start with in Photoshop. The first thing to do is add perspective lines to assist in transforming textures. This is best done by creating vector Shape layers with the Line tool. Use Full Screen Mode With Menu Bar. This option used to be at the bottom of the Tools panel, but in CS4 it's in the new Application Bar. With this viewing mode, the image window extends out to the edge of the screen and you can zoom out to see a blank area outside of the borders of the image. A similar space in Illustrator is called the canvas, but as far as I know, there is no corresponding term in Photoshop. Here, the canvas is the visible artwork and anything placed beyond it is not seen. Selections and raster-based tools don't work in this area, but vector-based tools do. Set the Line tool to 1 pixel and make a line from a straight edge in the image out to what is presumably the horizon. You can see that the line extends into this blank are beyond the Photoshop canvas, whereas a raster line would not.  Incidentally, you can change this background color by right+clicking on it and then choosing a better color than the default midtone grey. That's what I have done.

Hold down the shift key and you will see a little plus by your cursor. Now you can add a new line to this Shape layer instead of creating a new layer (which is what would happen by default). That is the goal: to put all these lines on one layer. I often use a Shape layer for each axis: X, Y, and Z. If I get too many lines going, then I'll add new layers. Unlike Illustrator, all the vector shapes on a single Shape layer must be the same color. This is because the layer really only holds one color and the vector shapes are acting as masks to show that color.

Where two lines converge that are in reality parallel is a vanishing point. Remember perspective class? For most 3D rendered scenes, you will probably have three vanishing points (for width, height, and depth), but depending on how much objects are turned, you could have more. I used to use raster lines, but with vectors, you can grab the ends and move them around; this is amazingly useful, especially  if you didn't get it quite right the first time. In order to reposition a line, you must use the Direct Selection tool. That's the white arrow. One odd thing to keep in mind is that since Photoshop doesn't like open paths, these are not stroked rules like you might find in Illustrator. Each line in Photoshop is actually a long, skinny rectangle acting like a mask. Vector shapes here don't have strokes and fills. So to move just one end, you have to make sure you select both points on the end with the Direct Selection tool. Dragging a marquee to select them both is the easiest way. What's great about this technique is that you can zoom out to select what you need, then zoom back in to view a different part of the image and use the arrow keys to move the line end(s). Hold down Shift to move in increments of 10 pixels instead of 1.

With the vanishing points and perspective lines set up, it's time to start texturing. For this, you'll need to make or load some patterns. Texture map libraries for 3D models are a great resource. For this application, we need seamless building patterns: photos of brick, stone, windows, etc. Put together a library of patterns that are most applicable to the kind of work you do. Keep adding to it when you come across new ones you like. Other useful textures are cracks, concrete, wood planks, dirt, grass, and decorative architectural elements. You can also save your patterns as an external file and take them with you.

Load an alpha channel from your render and use it as a mask on the render layer. Create a new layer and fill it with any color. Then add a Pattern Overlay with Layer Styles. Choose a window texture that you like. Don't worry about its scale; we can deal with that later. Convert it to a Smart Object by right-clicking on it in the Layers panel and choosing from the drop-down menu. ALT/OPT+click between the two layers to use the render layer as a clipping mask. Now, transform the Smart Object layer with Distort and Skew. This is only possible in CS4. In previous versions, transformations like Warp, Distort, and Perspective would not work on Smart Objects, so this technique did not exist. But now, Smart Objects are finally 'smart' and can be fully transformed. Vector Smart Objects are still limited, though. Oh well, maybe in CS5.

You may be wondering why I didn't use the Vanishing Point filter. Well, if you look carefully, you'll see that it's not really a filter, since it's in a category all by itself. Vanishing Point doesn't recognize Smart Objects or vector shapes, so it is limited. Also, I have found the quality of the images it produces lacking at times. Transforming Smart Objects is non-destructive, so it really is the way to go. Try different Blend modes to see what you like. You want the highlight and shadow of the 3D object to show through; that's the whole idea. For this one, I chose Overlay at 80%. Hard Light, Soft Light, and Multiply may also work.

This first building has a middle piece that sticks out from the front face, so the windows need to look like they're wrapping around it. First, use the Polygonal Lasso tool to make a selection around this part, then add a mask to the layer. Duplicate the layer and invert the mask. You will also need to mask out the dark sides of the building. Be sure to unlink the mask from the layer so that you are only transforming the Smart Object and not the mask as well. The great thing about Smart Objects in CS4 is that when you go back to transform them, all the settings are still there; nothing has been reset. The skewed sides are still in place, so to match the window pattern to the receded front, grab the top and Scale it down a bit. The grab the bottom edge and scale it as well so that you end up with the same height as when you started. Make sure you don't just move it; that will mess up the perspective. If you scale the edges instead, you will keep them perfectly aligned with the perspective of the scene.

If the building texture isn't quite right, you can double-click on its layer and edit the Smart Object, which opens up as a PSB, for some strange reason. That's also Photoshop's large document format for files over 2 Gb in size, so why it should be the file format here as well is a mystery to me. It's apparently not a linked file that resides externally; it just magically pops up when you want to edit it. With the Smart Object open, you can edit the Pattern Overlay to change its Scale or even choose a new texture altogether. When you're done, save the Smart Object and your main file automatically updates. Pretty neat! You can keep making adjustments in this way until the pattern is perfect.

This building has windows only in the recessed areas. Since all the shapes are composes of straight lines, it's easy to make a selection for the mask. With the non-destructive editability of Smart Objects, you can keep fine-tuning all the sides until they match up. These windows worked best in Multiply mode. For the blue building behind it, Hard Light gave the impression of shiny glass and steel. Adjust the Opacity of each layer as needed so that the original balance of highlight and shadow on the render shows through.

The smaller building in front was done the same way. A brick pattern was used as that's more likely in a building with fewer storeys. Pick textures that you like to give each building some unique character. Notice that all of these layers are clipped to the bottom render layer, so that nothing sticks out beyond the building shapes. What's cool is that with not very many patterns, you can create a wide diversity of buildings, just by varying the scale and Blend mode of the Pattern Overlays, along with the color behind them. And the best part of it all is that with Smart Objects, you can come back and easily make more changes. In a few clicks these could be completely different buildings. This is something I've been waiting for in Photoshop for a long time, so I'm glad Adobe finally implemented it.

04 April 2010

Illustration for April

This month, I am showing an image that is a bit different from the previous ones. It still has realistic painting and textures, but the perspective is exaggerated. I worked on this image with another designer who built the geometry in Cinema 4D. To achieve this unusual look, the scene camera's Aperture Width was set to 50 and the Field of View to 69ยบ. The camera was then moved in close so that the models filled the image area and the perspective around the edges was distorted. I did some final editing and positioning of the 3D geometry. 

The final render was brought into Photoshop for painting and texturing. Some photos were used to streamline the process. I was able to develop a texturing technique with Smart Objects that was not possible in previous versions of Photoshop. This was very exciting because it allows a greater degree of editability and flexibility with transformed objects that I had been hoping for since I first began using the Transform tool to Skew and Distort. I'll share this technique in this image's first tutorial.