
Now it's time for one of my favorite effects. I showed this technique back in the very first tutorial on this blog, but I like it so much, I'll share it again. Even if they are not visible in the photo, most structures that are out in the elements will have some weathering. This is often cause by dirt or rust that collects in recessed areas, combined with rainwater dripping down from those areas. The result is streaks from windowsills, cornices, and other architectural features.

 You could paint these in by hand, but there is an effective way to do this with a filter. The first thing we need to do is make selections of all the elements we want to use as sources for the streaks. In this case, it's the windows and the signs that are mounted to the buildings wall, as well as the top edge of the building. Hold down CTRL (PC) or CMD (Mac) and click on the main building layer's thumbnail image. Make sure the holes at the top get included. Next, we need to subtract from this selection. To do this, keep holding down CTRL or CMD, press ALT/OPT as well, and click the other layers' thumbnails. Go to the Channels panel and make a new alpha channel. Invert the selection and fill with white. We are working with the channels because we need to end up with a selection. The white areas will create our selections when we are done. Also, the filter we have to use will only work on existing pixels, not on empty ones.
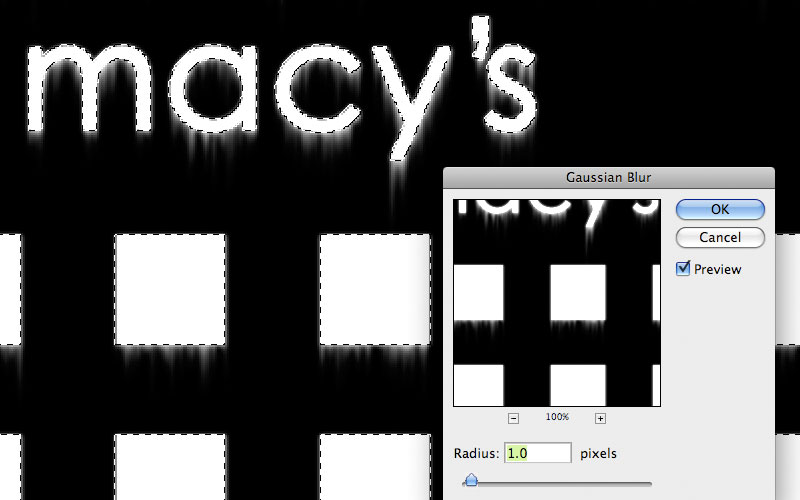
 These are streaks, but they are rather thin and harsh. If that's what you want, I won't judge, but you can adjust them further. Load a selection from your original, unWinded(?) channel and invert the selection. This is so that we affect just the streak areas. Add a Gaussian Blur; this needs just a small amount. Now you have smoother, softer streaks. If you need to make them more substantial, do a Levels adjustment. As you bring the white and black sliders in, the edges sharpen up and the streaks get denser. Adjust the midtone slider to to give more or less streaks as you need. As you can see, by adjusting the amount of blur and Levels adjustment, you can create all different sorts of streaks. When you like them, load a selection from this channel.


Situs REPUBLIKSLOT sebagai situs permainan judi online uang asli dan slot gacor online terbaik 2022 di Indonesia menyediakan layanan bermain slot pulsa 24 jam tanpa potongan. Yang siap menemani anda bermain tanpa offline dalam mendapatkan keuntungan jackpot slot gacor online terbesar. Dan melalui daftar slot pulsa 10rb, anda bisa temukan 500 lebih game slot gacor mudah menang dari 19 daftar provider slot resmi di https://94.237.78.17/ dan memainkannya dengan 1 akun ID saja.
ReplyDelete