26 October 2010

Texture-mapping the 3D model (3 of 3)

If you want, you can make a specular map as well. Just like the bump map, this is a greyscale image, but this time it controls shininess. The lighter parts will be shiny and the darker areas less so. Start with the color image and add Adjustment layers to remove the color and increase the contrast. Save it as a separate file.

Now it's time to go into a 3D program. I am using Cinema 4D, but you can use Maya, 3D Studio, or just about any other. Make a cube primitive. Since the images are 200x1000 pixels, it will work best to make the X and Z dimensions of the cube that same ratio. Lower the Y value or height so that the shape is a thin slab. It's also a good idea to add just a bit of a fillet to the edges. Nothing in real life has the perfectly sharp corners of a default 3D primitive; there is always some bevel or rounding. Create a new material and load the color, bump, and specular maps into the appropriate channels. For this model, a cubic projection is the best way to apply the texture. I won't go into detail here because each program is different.

Your main decision here will be to adjust the amount on the bump map. You may need to do some test renders until you get the right look. Add some lights and any other effects you want, like Global Illumination or Ambient Occlusion. I used AO here. For a long strip, scale the cube along the Z axis and make sure the texture is set to tile.  Render out your scene and there you have it: a nicely textured 3D model. You see, 3D isn't so hard after all.

23 October 2010

Making the bump map (2 of 3)

Next, we need to make the bump map. This is a greyscale image that gives the 3D program information about the relief or depth of the image surface. Our color texture looks good, but if it were applied to a 3D model, the result would be rather unrealistic. On the real item, the non-skid pattern sticks up from the rest of the yellow panel, the metal strips are a bit lower, and the seams or gaps would be even lower recesses. All of this detail could be built into the geometry of the model, but that would be time-consuming and the result would be a much more complex model.  

This detail can be simulated with a bump map. The grey values will give the 3D renderer this information; light values will be high and dark values will be low. So what we need is basically a greyscale version of our texture that is exactly the same size as the color version. But we also need to remove any unnecessary parts like the dirt or splotches. Turn off the Clouds layer. Disable the Pattern Overlay on the grey strips layer and the Gradient Overlay on the yellow layer. These details make the texture look better, but they are not part of its depth. Now, add an Adjustment layer to remove the color. You could use Black & White or Hue/Saturation and take the Saturation down to 0. This looks pretty good, but the non-skid texture is lacking in contrast. As it is now, these little bumps won’t stick up very far. With this pattern, changing its Blend mode to Hard Light, then lowering the Opacity to 40%, it looks about right. If necessary, you could use a Levels or Curves Adjustment layer to push the contrast a bit more, but this will work. 

Save this file as a new image and that’s it; your bump map is done. But before going to the time and trouble to do a full render from your 3D scene, you can use Photoshop to test it out. To do this, open up your original texture, Select All, Copy Merged, then Paste on a new layer. We need a flattened version of the texture for this technique. Now do the same thing to your bump map image. Go to the channels of your color map image, make a new Alpha channel, and Paste in the merged copy of your bump image. 

Go back to the layers and click on the merged copy layer of the color texture. We’ll try a nifty trick with Photoshop’s lighting effects. Go to Filter >Render >Lighting Effects… Grab the light source and move it up and away from the image to get some more even lighting. Now for the important part: for Texture Channel, choose the new Alpha channel you just made. Make sure that White is high is checked. You may also want to move the Height value down somewhat from its default setting of 50. 

Click OK and you see your texture lit with the Alpha channel acting as a bump map. The higher areas are catching more highlights and casting shadows on the lower areas. Your texture is no longer flat; it has some depth. It is becoming three-dimensional. This is similar to what your 3D program will be doing, but you can get a nice preview here in Photoshop to see if there are any problems. Check in next time as we start working with 3D geometry.

20 October 2010

Making the color map (1 of 3)

The first part we will work on is the color map. This image will provide the overall color of the 3D object. Texture maps have many different properties in the 3D program; this one will be called color or maybe diffuse, depending on the program you use. 

When creating the image in Photoshop, work in pixels, not inches. And don't worry about resolution; all the 3D program will see is pixels. Resolution only matters when you are going to print your image. Another thing to be sure of is that you are working in the sRGB color space, as opposed to Adobe RBG (1998), which is designed more for print. How large should you make your image? That all depends on what size it will be in your final rendered scene or animation. A good rule of thumb is to estimate the final size in pixels, then work at 150% or 200% of that size in Photoshop.

This image is at 200x1000 pixels. That's probably much larger than is necessary, but there is no problem working big and it will make our job in Photoshop easier than if it were a tiny image. To start out, use the Rectangle tool and make a vector Shape layer using PMS 416. Even though the final will get rasterized on the 3D geometry, working with vectors is a great way to work in Photoshop because they are so flexible and editable. You can also easily extend them beyond the canvas so that layer effects don't stop at the edge of the image. This shape will be the dull metal strips on the sides. To make things look used and grimy, add some effects like a dark Inner Glow in Multiply mode and maybe Bevel and Emboss. A Pattern Overlay will work here as well, in this case, Photoshop's default Clouds pattern is useful. Take the Scale up and set its Blend mode to Multiply, so we get a nice, dark, splotchy texture.

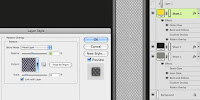
Next, we will create the channel in the middle that the non-skid strip will fit into. Make another vector rectangle on a new Shape layer, this time with PMS 419. As before, extend the top and bottom past the canvas size of the image. This is because this texture needs to tile vertically. Add some dark Outer Glow and a Bevel and Emboss. Give it a Gradient Overlay with the settings shown here. The idea is to darken the edges a bit.

For the yellow part, make a new vector rectangle using PMS 108. Extend it past the canvas on the top, but not the bottom. Select it with the Path Selection tool, then Copy and Paste. Move your second rectangle down so that there is a little gap between the two. Now you have two non-skid panels. They will need the same Outer Glow, Gradient Overlay, and Bevel and Emboss as the other layers. In fact, you could just Copy and Paste the Layer Styles to save time. But this one needs a stamped metal texture or something similar like this. If you don't have a pattern like this, it should be easy enough to find on the web. Scale it down to the right size and set the Blend mode to Overlay. That way, you get the lights and darks of the texture, but the midtone values drop away. Now we are starting to get somewhere.

It looks good, but the problem is that it's a bit too clean. The trick with computer graphics is to make things look scuffed, used, and dirty. To get the look of dirt stuck in the recessed areas, make a new layer, set your foreground/background colors to the default black and white, then apply the Clouds filter. Change the Blend mode to Multiply and lower the Opacity if needed. Then, clip it to the non-skid panel's layer so that the vector rectangle becomes its Clipping Mask. Now the non-skid texture appears on top of the Clouds texture and it looks like there is dirt in the crevasses. It's done! Next time, we will make the bump map.

15 October 2010

This month's tutorial - texture maps

For this month, we are going in a bit of a different direction. It's not quite illustration, but making texture maps for 3D models is a very important use of Photoshop. Much of the final process happens in the 3D program, of course, so we will concentrate on what you need to do in order to create good images.

I have a new 3D animation up on my site. You can view it here. There's a lot going on here and many of the textures are procedural, or created right in the program itself. But I did need to make some specific maps for signs, machinery, control boxes, and the floor. In the next tutorial, we will see how to make texture maps for the yellow non-skid strip that goes along the floor.

13 October 2010

Digital illustration classes

One of the places where I teach is the Bay Area Video Coalition (BAVC) in San Francisco. When we can get enough people, I do a 2-day digital illustration course that I have put together. It covers many of the techniques that I share here in my blog. Click here to read a bit about me and my work as they try to drum up some interest to hold another class this year.

And I think I have figured out what this month's tutorial should be. It's been a busy month as I am getting ready to go back to my alma mater BYU and speak to the art department about my career since I graduated. That should be fun.