

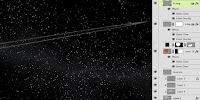
To finish up Jupiter, we need a softening of the planet's edge on the lit side to suggest the atmosphere. This effect will probably be a bit exaggerated, but it's commonly done on planet paintings and it will look cool. The best way to do this is with Layer Styles. Load a selection from Jupiter, create a new layer, and fill that layer. It doesn't matter what color you use, because the Fill will be set to 0%. Add a small Inner and Outer Glow in Screen mode, using a reddish brown. Now there is a soft glow around the planet's edge. In order to have it fade away along the dark edge of Jupiter, make a mask on this layer and put a linear gradient on it. In order to avoid strange transitions along this gradient edge, be sure to check the Layer Mask Hides Effects option.

 Did you know that Jupiter has rings? I don't know if they would be visible from one of its moons, but it seems like a cool element to add. If you can find an astronomical image of some rings that will work, put it in an alpha channel and load a selection from it. You can see my selection here. With the selection active, make a new layer and fill it with a light color picked from the planet. Add a subtle Outer Glow in Screen mode and a Color Overlay if you need to adjust the color. If you want, you can put the left and right rings on separate layers and give the left side of the rings less glow because they are in shadow. Lower the rings' Opacity so that they don't stand out too much. I used 50%.

 This looks good, but to make them look rounder and less flat, create some new layers to darken the edges and brighten the middle. Use a reflected gradient with a bright color for the middle of the planet and a linear gradient with a darker color for the edges on a separate layer set to Multiply mode. Adjust the layers' Opacities as necessary. You will need a mask on these layers, so load a selection from the ring layers and use it as a layer mask for these layers. Here you can see the mask I used. The rings are now complete, but something is still missing. They should probably be casting a shadow against Jupiter, given the current lighting setup. This shadow will also help make the planet look more spherical.
 Use the Pen tool to create a gentle curve that cuts across the planet. It should follow the rings quite closely around the middle and curve away toward the edges. Set the Fill to 0% and make a stroke with Layer Styles. Pick a dark color from the image for the stroke color, set the size to 3 pixels, and use the Center position. So that the stroke is only visible across Jupiter, load a selection from the planet layer and use it to create a layer mask on this layer. Check the Layer Mask Hides Effects option. The shadow layer should be set to Multiply mode and the Opacity lowered. I used 60%. Now you too can see Jupiter's rings.

 Did you know that Jupiter has rings? I don't know if they would be visible from one of its moons, but it seems like a cool element to add. If you can find an astronomical image of some rings that will work, put it in an alpha channel and load a selection from it. You can see my selection here. With the selection active, make a new layer and fill it with a light color picked from the planet. Add a subtle Outer Glow in Screen mode and a Color Overlay if you need to adjust the color. If you want, you can put the left and right rings on separate layers and give the left side of the rings less glow because they are in shadow. Lower the rings' Opacity so that they don't stand out too much. I used 50%.
 This looks good, but to make them look rounder and less flat, create some new layers to darken the edges and brighten the middle. Use a reflected gradient with a bright color for the middle of the planet and a linear gradient with a darker color for the edges on a separate layer set to Multiply mode. Adjust the layers' Opacities as necessary. You will need a mask on these layers, so load a selection from the ring layers and use it as a layer mask for these layers. Here you can see the mask I used. The rings are now complete, but something is still missing. They should probably be casting a shadow against Jupiter, given the current lighting setup. This shadow will also help make the planet look more spherical.


No comments:
Post a Comment