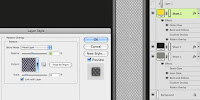
If you want, you can make a specular map as well. Just like the bump map, this is a greyscale image, but this time it controls shininess. The lighter parts will be shiny and the darker areas less so. Start with the color image and add Adjustment layers to remove the color and increase the contrast. Save it as a separate file.
Now it's time to go into a 3D program. I am using Cinema 4D, but you can use Maya, 3D Studio, or just about any other. Make a cube primitive. Since the images are 200x1000 pixels, it will work best to make the X and Z dimensions of the cube that same ratio. Lower the Y value or height so that the shape is a thin slab. It's also a good idea to add just a bit of a fillet to the edges. Nothing in real life has the perfectly sharp corners of a default 3D primitive; there is always some bevel or rounding. Create a new material and load the color, bump, and specular maps into the appropriate channels. For this model, a cubic projection is the best way to apply the texture. I won't go into detail here because each program is different.
Your main decision here will be to adjust the amount on the bump map. You may need to do some test renders until you get the right look. Add some lights and any other effects you want, like Global Illumination or Ambient Occlusion. I used AO here. For a long strip, scale the cube along the Z axis and make sure the texture is set to tile. Render out your scene and there you have it: a nicely textured 3D model. You see, 3D isn't so hard after all.
Your main decision here will be to adjust the amount on the bump map. You may need to do some test renders until you get the right look. Add some lights and any other effects you want, like Global Illumination or Ambient Occlusion. I used AO here. For a long strip, scale the cube along the Z axis and make sure the texture is set to tile. Render out your scene and there you have it: a nicely textured 3D model. You see, 3D isn't so hard after all.


