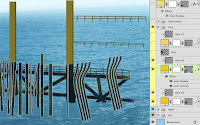
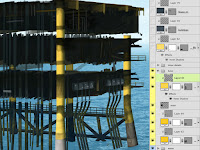
 For the base of the oil rig or platform sitting in the water, we'll need the Line tool. Make sure it's set to make a Shape layer and start putting in the columns with thick lines. Use PMS 123 as the color. Hold done the Shift key as you make each new line so that they are all on the same layer. Use smaller lines for the railing. The left and right bracket keys are a handy way to make your lines lighter and heavier, respectively. Since these columns are on the far side, add a Color Overlay of 296 in Multiply mode to show that they are in shadow. A bit of an Inner Shadow is nice, too. Add a layer mask and paint out where the columns go into the water. Then, on a new layer clipped to the Shape layer, do some random dark painting to suggest grime, rust, oil, corrosion, and so on. This is the pattern we will follow for most of this rig. On a new layer, build some thinner vertical pipes with the Line tool. Use the same colors and Layer Styles as on the first set. To create the curved pipes, you can draw the line first, then use Transform >Warp to curve them. You could also click on a line with the Path Selection tool, then use the Pen tool to add anchor points, then use the Direct Selection tool (the white arrow) to move points and adjust the curves. Once you have a curved pipe that you like, select it with the Path Selection tool (the black arrow), copy, and paste it to create duplicates. The idea here is to keep all of them on one Shape layer. To keep things simple, I mentally divided the base into back-, mid-, and foreground components. Each has its own layer. This one is the mid layer.
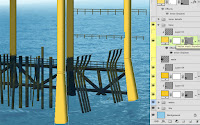
Now, create the foreground parts of the base structure using the same tools, colors, and techniques. Use the Direct Selection tool to click on corner points and move them out to widen the bases of the columns. Remember that Photoshop doesn't really make lines; even the smallest of these are actually rectangles. This Shape layer won't need the Color Overlay, because it's not in shadow. See how the depth is created here? As you are working, keep in mind where the sun is and where the core and cast shadows will be.
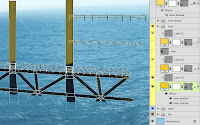
In between the front column and middle pipe layers, make a new layer and paint the interior levels of the platform. This can be done loosely. Just try and suggest pipes, beams, control panels, and so on. An easy way to paint perfectly vertical or horizontal lines with the Brush tool is to hold down Shift as you are painting. Then, make a new layer above the front columns and clip it to that layer, just like on the mid and back layers of the base. Paint shadows, grime, and other details on it, using the vector Shape layer as a Clipping Mask.
This part of the rig is done, so it's time to turn our attention back to the water. Make a new layer in Multiply mode and 70% Opacity above all the other water layers and paint the shadows in with 5535. I used my favorite Pencil -Thin brush, but I used the Brush Tip Shape section of the Brushes panel to rotate it so that it was horizontal instead of vertical.
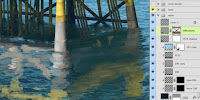
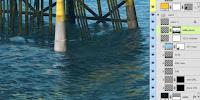 Paint the reflections of the structure on a new layer. Use a larger brush and pick colors right from the platform base. Paint the reflections very loosely; there's no need for detail here. The reflections will only show up on the lighter areas of the waves, the part that faces upward to the sky. Where the water surface faces away from the sky or the oil rig, there will be no reflection. These are the darker areas. So, make a mask on the reflections layer, load a selection from your painted shadows or other dark parts of your water, and fill the mask with black to block out the painted reflection from these areas. The result should look about like this. Notice how you really don't end up seeing much reflection at all. This is because the sea is choppy and much of the water surface faces away from the sky or whatever is sitting in the water. On calmer water without waves, you would see more reflection.



No comments:
Post a Comment