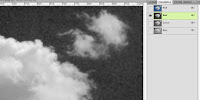
 Now we are going to create a custom brush for painting clouds. A great way to do this is to start with a photo. Look for one that has nice edges against a flat blue background. Then look at the channels to find the one that has the most contrast between the cloud and sky. In this case, that is the red channel, but it also has a lot of noise, so the green channel might be a better choice. It has a decent amount of contrast and is much better than the blue.
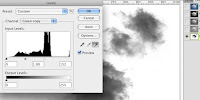 Duplicate the channel. There are several ways to do this, but I prefer dragging the channel down to the Create new channel icon at the bottom of the panel. This will make an alpha channel. If you have been paying attention to previous tutorials, you'll know that alpha means transparency. In making a new brush, the white will be transparent areas and black will put down 100% of your foreground color. Greys will be varying degrees of opacity based on their value. Since in our new channel the sky is dark and the cloud light, it needs to be inverted. You can choose Image>Adjustments>Invert, or simply press CMD (Mac)/CTRL (PC)+I. Now do a Levels adjustment on the channel. Click the little white eyedropper and click on the open sky. This makes the color you pick and anything lighter pure white. If you want part of the cloud to be 100% opaque, select the black eyedropper and click. You can use the grey eyedropper to adjust the cloud density. When it looks good, use a Lasso tool to make a selection around the part you want to include in the brush. Then select Edit>Define Brush Preset... Name it whatever you like. I named mine big cloud.
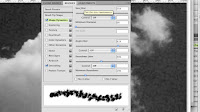
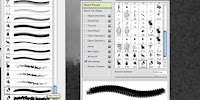 You now have a new brush, but you need to customize it in order for it to be useful for painting clouds. I like to use the Stroke Thumbnail option on the Brush flyout menu. You access it by that little triangle button at the top right corner. It shows you what a stroke with each brush would look like. Now open the Brushes panel. We need to give this brush some randomization.
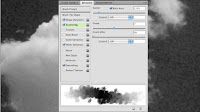 Click on the Shape Dynamics controls. Crank the Size and Angle Jitter up. Make sure the Control option is set to Off. Experiment with the other settings if you want, but you do need high jitter values in Size and Angle. Jitter is the amount of randomness in each of these settings. Now click on the Scattering controls. Check the Both Axes option. Now your brush will scatter along both the X and Y axes. Adjust the Scatter and Count sliders. Watch how the stroke example changes. Higher Scatter gives you clouds that spread out more. A higher Count makes denser clouds by adding more brush instances. Adjust the sliders until you like the stroke preview. Again, make sure the Control options are set to Off. The final thing to do is to click on the Other Dynamics control and set the Opacity Jitter to Pen Pressure. It's odd that one of the most important controls is hidden in this nondescript category, but so it goes. Keep the Flow at 0%. You will need a pressure sensitive tablet to do any real painting.
That's about it! You will need to save this brush in order to keep all of these customized settings. Click the little New icon just under the triangle button in the Brushes flyout to save this new brush as a preset. Try this with different cloud photos and custom settings to build up a library of different cloud brushes. Some can be soft, scattered, and foggy; some can be more distinct with less randomization. Do some test painting to see which ones you like. That's what we will do in the next tutorial




No comments:
Post a Comment