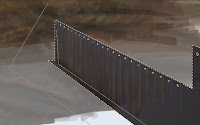
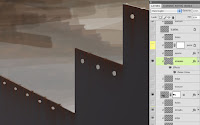
Now we will begin to create what are called the tail walls of this piling construction. I began with a simple, flat raster shape filled with PMS 446, which is a dark, steely grey. I transformed it into position using Skew and Scale using the techniques I showed in the very first tutorial for this image. When the perspective looks right, it's time to start adding textures for realism.
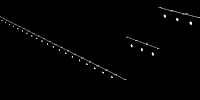 The wall needs some rusty streaks running down from the top edge and the holes. There is a great way to do this, but it requires a few steps. You'll need a selection of the holes and the top of the wall and an Alpha channel. Select the pixels of the bottom wall layer. A great way to do this is to CMD (Mac)/CTRL (PC)+click the thumbnail image in the Layers panel. Now you have a selection based on the visible pixels on that layer. But we need the empty areas selected. Invert the selection, then use a Lasso tool to to remove all the selection except for the holes. Holding down ALT/OPT will subtract from your current selection. I have the top profile of the wall as a shape on another layer higher up in the Layers panel. To add a selection from its pixels to the holes selection, hold down SHIFT along with CMD/CTRL and click on its layer thumbnail. Now go to the Channels and add a new channel. The background should be black, so fill the selection with white. This will be used to make a new selection, but we need to add the streaks. Wind is a great filter for this. As with many Photoshop filters, it's not so good for what it was designed for, but it's good at other things.
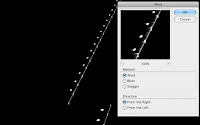
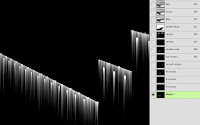 The problem is that in Adobeland, wind apparently only blows left and right, but we need it to blow down. Maybe someday Adobe will figure this out, but until then, you'll have to rotate your canvas to get this to work. Select Image>Image Rotation>90º CW. Now go to Filter>Stylize>Wind... Choose Wind as the Method and From the Right. It's a neat effect, but it's not quite enough yet. The filter will need to be run a few more times. An easy way to do this is to press CMD (Mac)/CTRL(PC)+F to run the most recent filter. Do this a few more times until the streaks are as long as you want, then rotate the canvas 90º CCW. This is a great way to make many kinds of streaks, but it has other uses. From here, you can make them softer, fatter, blobbier, and run all sorts of filters on them, but that will be for another tutorial. For our needs, these will work fine as they are. Load a selection from this channel, make a new layer and and fill it with a rust color.
I suppose you could hand paint something like this, but this filter is great at creating that randomness that is so hard to do manually. Usually Multiply mode is best for streaks like this, but since the wall was already dark, the rusty streaks need to be lighter than the background. After a bit of experimentation, I chose Hard Light as the blending mode. I also gave them an Outer Glow effect with a rusty brown in Multiply mode and added Noise. Remember that glows don't have to be bright. The streaks look good, but they are a bit too prominent. Reducing the layer's Opacity would also take down any layer styles, so lower the Fill instead. This reduces the opacity of the pixels on that layer, but leaves any layer styles intact. The effect is subtle, but sometimes that's exactly what you need. Tune in for the next tutorial to see how the wall gets finished.




No comments:
Post a Comment