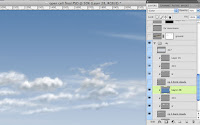
In the previous tutorial, we made a custom cloud brush, but you can also find some great free ones on the Internet. Once you have them saved or loaded, use a stylus and start painting. Try several different ones. Look at cloud photos and try to duplicate the patterns and shapes in nature. Create a new layer to work on. I chose cool grey 3 from the Pantone library for the base color of these clouds. Another good brush for this kind of work is the 11 pixel chalk brush that comes as one of Photoshop's defaults. It's great for soft natural edges like these where you need a bit more control than a scatter brush. You will need to set the Opacity Jitter to Pen Pressure and if you want, add some Scattering as well. The great thing is that you can size custom brushes up and down; it hasn't always been that way with earlier versions of Photoshop. The left and right bracket keys to the right of the P are a very handy way to do this while you are painting.
 Create a new layer on top of this base layer. Use the bottom cloud layer as a Clipping Mask (OPT/ALT+click between the layers). Then paint white on the upper layer with various brushes to make the cloud highlights. I usually avoid pure white unless I'm simulating luminosity, but it seems to work well for clouds. You can always adjust the layer's opacity later if necessary. Now you need a shadow layer. I used PMS 443, which is a very bluish grey. Usually, I use Multiply mode for shadows, but on bright sunny days, distant cloud shadows are fairly light, so Normal mode works just fine. Then create yet another layer and put a gradient of the main sky color (in this case, PMS 646) to transparent. Set this layer's blending mode to Color and the Opacity to 40% to simulate some extra blue tint that comes from looking through more atmosphere at the horizon.
We did the farthest clouds with the Clouds filter in the last tutorial. Now we have the middle clouds and we still need the foreground clouds. Follow the same sequence as the mid clouds and create new base, highlight, and shadow layers for the foreground clouds. Paint on each one using the same colors as you used on the mid clouds. They all should be clipped to the base layer of cool grey 3. Now add one more layer on top of your shadow layer for the foreground clouds. This will be for darker shadows, since the nearer the clouds are, the darker their shadows will be. I used the same shadow color to paint with, but I made this layer Multiply mode at 50% Opacity.
That should do it. Having three sets of clouds for foreground, mid, and background adds to the illusion of depth. Remember that as clouds get farther away, they should get smaller, lighter, and bluer (if the sky is blue). The topmost layer has a light bluish-grey gradient with Screen mode at 50% Opacity. This is to obscure the faraway clouds a bit more and make them look really distant. Also, in urban areas, the air tends to be filled with more particulate matter, so it's denser and more opaque at the horizon. We'll be putting a city back there, so we can't forget about the pollution. But the sky is done!


No comments:
Post a Comment