

 The bridge was built as a very simple 3D model and textured in Cinema 4D. It's a good starting point, but it needs some more detail and realism. The first step is to reduce the size of the stone blocks somewhat. The very same texturing technique used for the buildings will work here as well. Create a new layer and fill it with a color. Add a Pattern Overlay effect and choose a brick or stone texture. Convert that layer to a Smart Object and transform it into position using Skew or Distort, then adjust the Opacity and Blend mode as needed. I chose Darken at 70%. Now the larger blocks are obscured and there is more stone detail. And because it's a Smart Object, you can go back in and change the pattern's scale or choose a new one if you want to later.
Now it's time to start painting. Do this on a new layer with a fairly simple brush and the Opacity Jitter set to stylus. Paint in some architectural features to cover up the overall stone texture. Top areas will need cornices and edges often have larger stones. To paint the straight lines, you can use the Line tool with the option set to Fill pixels. That creates new pixels on your current layer, instead of making a new vector Shape layer. You can also click with a brush, then SHIFT+click elsewhere and Photoshop will draw a straight line between the two points. This often works better with a mouse. With a stylus, it's hard to get enough pressure for that second click. Add a new layer and set it to Multiply mode. Choose a warm grey or brown and paint in streaks and stains. These will often be under overhangs and in crevices. Use a photo as a guide for how it should look. In case you can't tell, this bridge was loosely based on the Brooklyn Bridge.
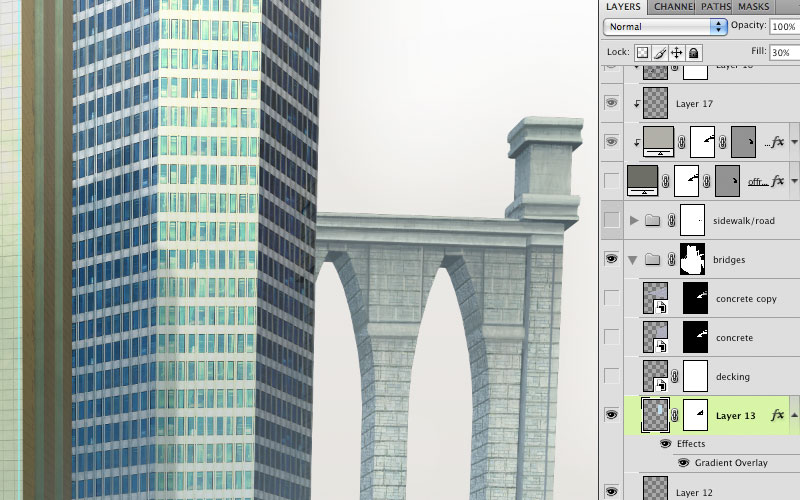
 As usual, clip all these layers down to the bottom render layer, which will act as the clipping mask. If you need to add details that stick out past the alpha channel of the original render, do it on a layer that is not clipped along with the rest. Since I lowered the top of the arches, I had to do this to show their undersides. Add a layer of light blue and maybe a Gradient Overlay to give the bridge some atmospheric perspective and push it back into the distance. As a last step, put all the bridge layers into a layer group and add a mask to it, then paint out some of the edges with black on this mask to remove the sharp, straight lines of the original 3D geometry and make it follow the contours of the new painted details. I did this on the group's mask so that I wouldn't mess up the rendered alpha channel used as a mask on the bottom layer.
That's about it. This was a quick one, but I hope it's useful. Tune in for more before the month is over.
That's about it. This was a quick one, but I hope it's useful. Tune in for more before the month is over.


No comments:
Post a Comment