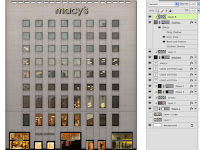
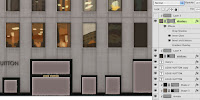
The last step is to paint in the reflections on the windows. This will probably need to be done with a stylus and tablet. The thing to remember is that you don't need to do much; simply suggesting shapes and colors in an abstract way can get across the idea of reflected sky, buildings, and so on. As you can see, what I have actually painted is very loose and light on details. Even though not much is really there, it works because this layer also uses the windows Shape layer as a clipping mask and 'inherits' its effects.
 For the ground level displays, make a new Shape layer with the Rectangle tool and PMS 410. Give this layer a little Bevel and Emboss and an Inner Glow in Color Dodge. Paint the window displays on a separate layer that is clipped to the Shape layer. Do this in a loose and free style like the window reflections. Using warm colors will help to differentiate the interior scenes from the exterior windows. That should do it. These last freehand painted details contrast nicely with the hard, angular details created by Pattern Overlays and vector shapes and give a sense of realism and randomness that the textures require. They also provide a much-needed splash of color that makes the building much more interesting to look at. If at this point you needed bump, reflection, luminosity, or other maps for texturing in a 3D program, these would be easy to make from your layers.


he last step is to paint in the reflections on the windows. This will probably need to be done with a stylus and tablet. The thing to remember is that you don't need to do much; simply suggesting shapes and colors in an abstract way can get across the idea of reflected sky black shalwar kameez design for girl , black shalwar kameez design ladies ,
ReplyDelete