As with most of these images, I start them 9x12 at 300 ppi. It can end up being a large file, but most are used primarily for print and this size gives me a bit of leeway for fullpage magazine ad sizes. I always begin with the sky, as this gives the overall mood for me to build on. The base layer is PMS 542 and I added a gradient of PMS 290 on a layer above it in Screen mode. Since I wanted a very light, almost overexposed look for the sky, I kept duplicating that layer until got the effect I wanted. Notice that the horizon is basically blown out to pure white. Then I added a light cool grey gradient on top.
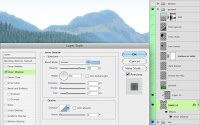
Next come the mountains. Start out on a new layer and paint the silhouette with a periwinkle blue color. Add an Inner Shadow effect to that layer. This is to simulate light wrap from the sky around the edge. Set the Angle to 90 so that the effect is just along the top. To make it more of a glow instead of a shadow, change the Blend Mode to Screen and pick a light blue. Remember that shadows do not have to be dark. Adjust the Size and Opacity to your own tastes. Paint the details like trees, highlights, and shadows on a separate layer that is clipped to the base mountain layer. That way, these details will 'inherit' the effects of the bottom layer. If you like, you could also add Color and Gradient Overlay effects to the bottom layer to push the mountains further back.
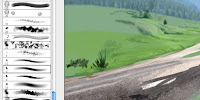
At this point, perhaps I should say something about the brush. My favorite brush and one that I use at least 75% of the time is one that comes with Photoshop. It's a 9-pixel thin pencil brush, found in the Natural Brushes 2 set. For me, the regular round brushes are too uniform and unnatural. I like this one because it has a bit of an organic shape that sort of mimics a real brush. Of course, it needs some customizing, so set the Opacity Jitter to Pen Pressure and use your tablet and stylus.
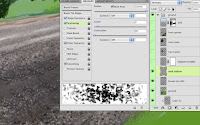
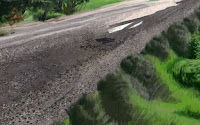
The painting is fairly loose, especially in the more background areas. The foreground areas naturally need more attention and detail. Painting all the rocks under the rails (called ballast) requires a special approach unless you want to paint each one individually. I certainly wouldn't. This is the perfect time to use a scatter brush. I'm still using my favorite brush, but I made another version where I added Size, Angle, and Roundness Jitter to the Shape Dynamics, then cranked the Scatter all the way up to 1000% on both axes. This is a great way to paint rocks, gravel, sand, or other bumpy textures. Just pick various dark and light greys and have at it. Reduce the brush size and paint with less pressure as you get farther away. I added a layer in Color mode and painted on it with PMS 462 brown to tint the rather colorless rocks underneath. Rocks will always have some interesting colors scattered in them, so look for these opportunities to add color whenever you can. The end result is pretty nice and would be next to impossible without a scatter brush. You may need to do some detailed manual touch-up in the extreme foreground, but that's about it. Finally, I added another layer in Multiply mode and painted some dark scattered rocks.
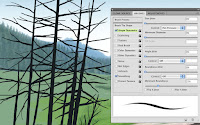
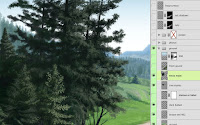
Not much more can be done here until the tracks are in, so we'll hold off on that for now. But it's time for some trees. On a new layer, paint the trunks using PMS 426. This is a very dark warm grey, almost a brownish-black. The trunks and branches won't need much detail because they will be shadowed and covered up by the leaves and greenery. To paint them, use the good old thin pencil brush, but this time with the Opacity Jitter turned off and the Size Jitter set to Pen Pressure. This is one of the few times I don't use the sensitivity of the tablet to control opacity. In this case, pressing down will give you the thicker trunks, while easing up on the stylus will create the tapering of the branches as they grow out from the tree, all while keeping the opacity constant.
Now it's time to paint the leaves, nettles, or whatever. Scatter brushes work well for this. Try some of Photoshop's Natural Media brushes and customize them by adding some Scatter and Jitter to the Shape Dynamics categories. Don't forget to set the Opacity Jitter to Pen Pressure. You'll see that the trunks and branches mostly get covered up in these kinds of trees, but they still provide the necessary underlying structure. I have found that very dark greens are needed to paint trees. I usually start out too light and have to end up going back in with darker colors. For the final touches, choose a small brush with no Scattering and paint some more definite leaves.
At this point, all that's left is to paint the foreground grass and bushes. Surprisingly, I have found that Photoshop's own grass brushes do a pretty good job of painting near grass, of all things. Just uncheck the Color Dynamics and make sure the Opacity Jitter is set to Pen Pressure. The only problem is that they are extremely large, so you'll just have to size them down. You may notice that I started out with a large brush and quickly scribbled in hints of highlight and shadow on grass and bushes. Then I went back with a smaller brush and painted the details. I used some scatter brushes along the way as well. Some of the foreground and even the midground are left unfinished because I'll be putting in things like the tracks, train, and people, so I'm not worried about finishing everything off here. Remember that in professional situations time is money, so don't spend any extra effort that you don't have to. For the next tutorial, we'll put in the 3D rendered items and start painting them.




No comments:
Post a Comment