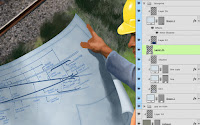
The last step to finishing this image is to have the guys holding a blueprint as requested by the client. The Pen tool is the best way to go about this. Many tutorials would suggest using it to make a path, then load a selection, and fill it on a new layer. However, there is a better way that leaves you with a shape that is much more editable with fewer steps.
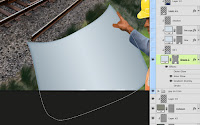
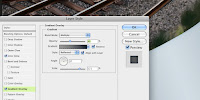 Start with the Pen tool, but check the option at the far left of the Options bar to make a shape layer instead of just a path. There are so many benefits to working with a vector shape in Photoshop. As you can see, you can build it so that it extends past the edge of the image. This way, Layer Styles will follow the edge of the shape, rather than the image. PMS 642 was used because it's a good color for blueprints and has a nice range of light to dark. An Inner Glow and Gradient Overlay were added, both in Multiply mode using dark blues from the same range as the 642. Noise was added to the glow to give the paper some texture. A reflected gradient was used to darken the sides, giving the blueprint a bit of a curve. To complete the look, add a new layer above the vector shape layer, hold down ALT/OPT and click between the two layers to use the bottom one as a clipping mask. Render the Clouds filter on the new layer with PMS 643 and white as the foreground/background colors. Set the layer's blend mode to Multiply so that the white becomes transparent. Lower the Opacity to 60%.
To create the rules on the paper, duplicate the blueprint shape layer and move it above the clouds layer. Transform the layer to make it smaller than the paper. Because the shape layers use vector masks and are resolution independent, you can transform them over and over without any loss of quality. Use Layer styles to give it a stroke of dark blue and Inner and Outer Glows of dark blue in Multiply mode. To make the fill of the shape transparent but keep the effects, lower the Fill (not the Opacity) to 0%.
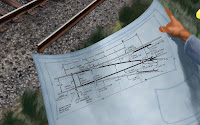 For the drawing to go on the blueprint, the client provided a black-and-white schematic. That image was dragged into the final illustration. Change its blend mode to Multiply to make the white transparent. To make it look like it's actually on the curving paper, use Transform and then Warp. With this option, you can move the corners independently like Distort, but you also have control handles that allow you to curve or envelope the sides. Move the points and adjust the sides to mimic the curvature of the paper. Don't worry about being too exact, so when it looks good, apply the transformation. To make the schematic blue, add a layer above it and use the schematic layer as a clipping mask. make a selection on this empty layer that covers the schematic, fill it with PMS 654, and set its blend mode to color. The schematic is now blue, but it's a bit too dark, so lower the opacity of the schematic layer to 80%.
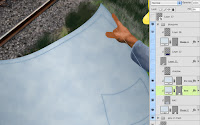
For the final touches, shadows were painted with PMS 296 on a layer set to Multiply. Lower its opacity until it looks good. The edge of the paper curling over was done with the pen tool to make a new shape layer with PMS 642. A little Inner Shadow effect was added to turn the curve. The last step is to add yet another layer in Multiply mode, clip it to the curling paper, and paint just a hint of shadow from the guy's arm. That should do it.
Stay tuned so see what I can come up with for next month's tutorial.




No comments:
Post a Comment