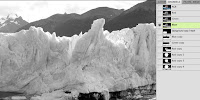
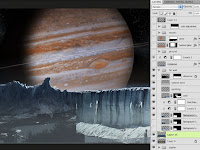
Since the background is pretty much done, it's time to turn to the foreground, which is supposed to be on the surface of Europa, an icy moon of Jupiter. The far edge of the surface up to the horizon will be an ice wall backlit by Jupiter. Start with photos of ice walls. Antarctica is a good source. Since I didn't have one that was large enough to stretch all the way across, I used two photos.
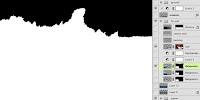 Once they are sized and placed, their backgrounds need to be removed. If you were about to reach for the Tragic Wand or other manual selection tools, that's strike one. Put it back. The best way to do this is to make a mask procedurally from the channels. Find the channel that has the most contrast between the area you want to keep against the area you want to remove. In this case, it's the blue channel. Duplicate that channel and perform a Levels adjustment. Slide the highlight and shadow sliders in to increase the contrast of these areas. Move the midtone slider as needed. What you want is pure black against pure white, with a bit of midtone to anti-alias the edge, so your sliders should end up quite close to each other. You may need to paint in black and white by hand above and below the dividing line. CMD(Mac) or CTRL(PC)+click the channel's thumbnail to load the white area as a selection. With the selection active, add a mask to this layer.
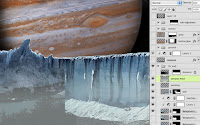 If your photos don't quite match each other (like mine didn't), add the necessary adjustment layers and clip them to the photo layer. I used Levels and Hue/Saturation adjustment layers on the left ice wall to darken it, grey it down, and warm the hue just a bit. The edge of the photos is still quite obvious, so it's time to do some hand painting. Even working with photo-realistic images, some painting like this is usually necessary. Use a small brush and pick colors directly from your image. Paint on a new layer the details needed to seamlessly join the images. I also painted out the highlights along the wall's face, since the lighting in this scene should come from behind and to the right. Then, I added a linear gradient on a new layer above all the ice wall layers using a light grey-blue picked from the image to suggest an icy mist floating in the canyon and lowered that layer's Opacity to 60%. It may not be astronomically accurate, but overall mood is my primary objective here.
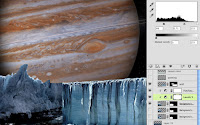
To further enhance the icy feel of the moon's surface, add some layers behind the ice wall and put linear gradients on them, using dark blue and rust colors. Set their Blend mode to Screen and adjust the Opacity as needed. The moon probably doesn't have an atmosphere for ice crystals to be suspended in, but it looks cool. Just don't show this image to many of your astronomer friends.




No comments:
Post a Comment