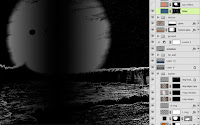
 The last step is to do some color correction to get the lighting just right. My original photo is barren and rocky. Since Europa is covered in ice, we need to make it a bit bluer, especially in the lighter areas. To create a mask for this, duplicate the red channel. Perform a Levels adjustment and pull in the shadow and highlight sliders to increase the contrast. Load this channel as a mask by CTRL(PC)/CMD(Mac)+clicking on its thumbnail. Create a new layer, add a mask, and fill it with dark blue. Experiment with Blend modes and Opacity to find an effect you like. I ended up with Vivid Light at 40% Opacity. Now the ground highlights are tinted blue, but they should be orange in the middle because they are lit by Jupiter's light. Add a vertical reflected gradient of black-to-transparent on the mask to hide the blue tint in this areas. We'll add some color back in with the next step.
Create a new layer and load a selection from the channel (not the layer mask) used in the last step. With the selection active, add a layer mask. Pick a bright orange from Jupiter and create a vertical reflected gradient on this layer in about the same spot as the black gradient on the mask of the underlying layer. Change the Blend mode to Hard Light and reduce the Opacity to 70%. Now, Jupiter is casting its light on the reflective surface of the icy ground.
Add a new layer, put a dark linear gradient on the left side, and change the layer's Blend mode to Multiply. Make a Levels adjustment layer and adjust the midtone slider as shown. Add a vertical black-to-transparent reflected gradient on the adjustment layer's mask, in the middle like on the previous layers with gradients. The idea is to darken the edges to make the middle seem more luminous.
Add a new layer in Screen mode and hand paint in some highlights along the ground as needed. Put all of these color correction layers in a layers group. You can do this by Shift+clicking to highlight the layers, then click CTRL(PC)/ CMD(Mac)+G. Load a selection from the far ice wall layer masks and add a mask to this group. Now all of the layers in the group will affect only the ground layers of the image and not the sky.
As a final step, add one more layer on top of everything else and put some dark linear gradients along the sides and bottom. Change the Blend mode to Multiply and lower the Opacity to 50%. This darkening of the edges mimics the vignette that can appear in photographic images. It's not entirely necessary, but it is a nice look and is similar to techniques used by the famous matte painter Yanick Dusseault, so it must be good.


No comments:
Post a Comment